I was recently working on a project where I wanted to have a generated terrain decorated with trees on which a NavMesh would be generated so the AI-driven enemies would be able to find appropriate paths to the player targets. I got the NavMesh working, but the NavMeshAgents were getting stuck, having traffic jams, and generally not following the paths I wanted them to.
Much of Unity’s out of the box NavMesh AI expects you to be designing the level in the editor, not generating it in code. So the first challenge was generating a NavMesh for a dynamically created environment where the “ground” was a random series of assembled GameObjects. This is where the Unity NavMeshSurface project helps out:
https://github.com/Unity-Technologies/NavMeshComponents/blob/master/Documentation/NavMeshSurface.md
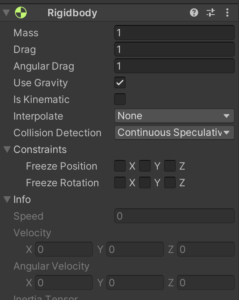
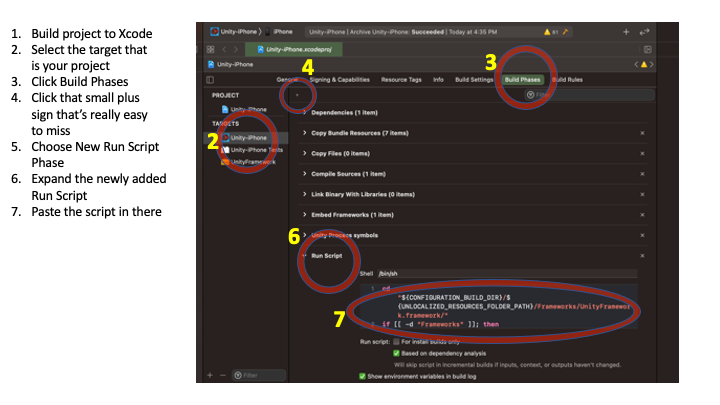
Download it and add it to your project. Once you have this, go to all the GameObjects you use to build “the ground” of your NavMesh and add the component NavMeshSurface – also set the GameObject as Navigation Static. Once this part is done, you’ll need to call two lines of code at the end of your environment generation routine:
NavMeshSurface nm = GameObject.FindObjectOfType<NavMeshSurface>();
nm.BuildNavMesh();
At this point, you should be able to run your code to generate the environment and it will have a generated NavMesh. Note that BuildNavMesh() is not the lightest API around – you might notice a burp in performance depending on how large the area is – try to call it at an inconspicuous point in your project.
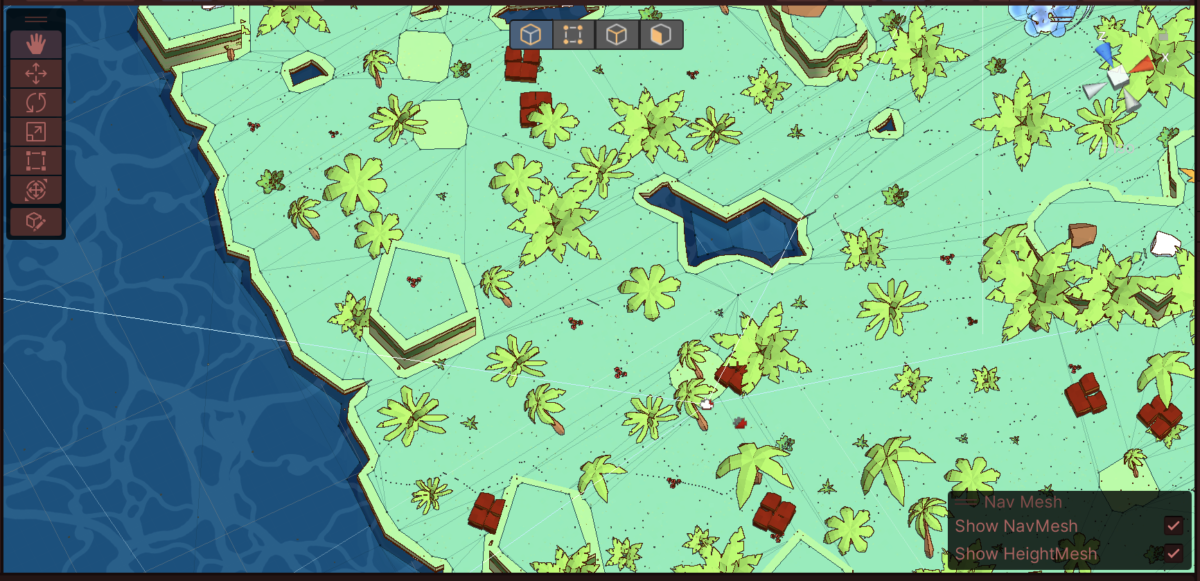
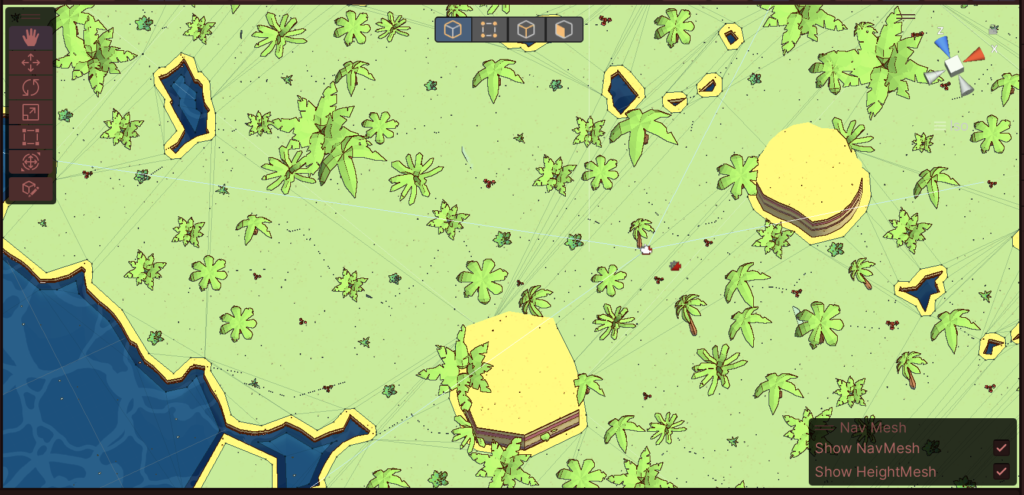
Now the annoying thing about generating your NavMesh on a decorated surface (like with trees) is that it assumes your decorations are obstacles unless you say they are not. The result is something like the NavMesh below where every tree on the landscape created a hole in the NavMesh, creating over-complex paths and resulting in “traffic jams” of the NavMeshAgents using the NavMesh (illustrated in the red path below) – the blue path is really what I wanted:
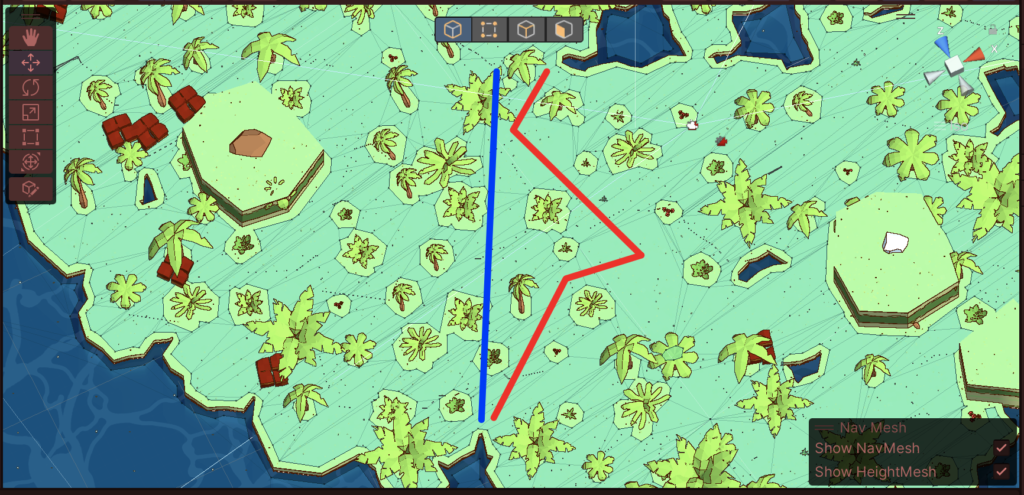
Sometimes you want trees to block navigation – sometimes you don’t. I did not. The NavMeshSurface package also contains a NavMeshModifier which can be used to instruct the NavMesh generation process to include/exclude objects from the build process. In this case, since I was already dynamically placing the trees, I added a line of code to attach the NavMeshModifier to each tree and tell the NavMesh generation process to ignore them:
tmpObj.AddComponent<NavMeshModifier>().ignoreFromBuild = true;This resulted in the below which was much better – notice how each tree no longer has a NavMesh hole around it:
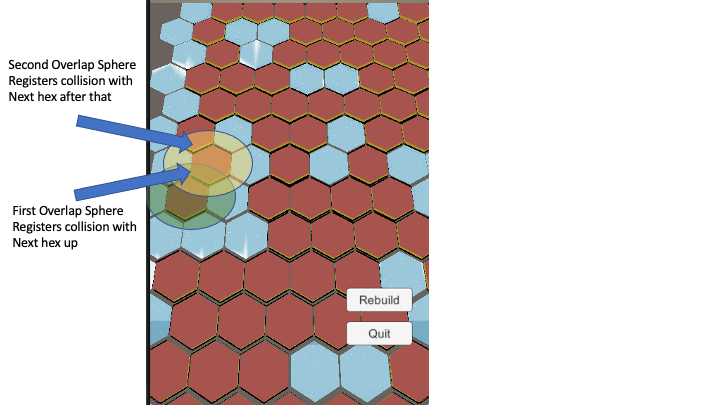
The next challenge was that I sometimes modify the terrain, elevating certain GameObjects up, at which point they would no longer be part of the NavMesh. The result was giving me:
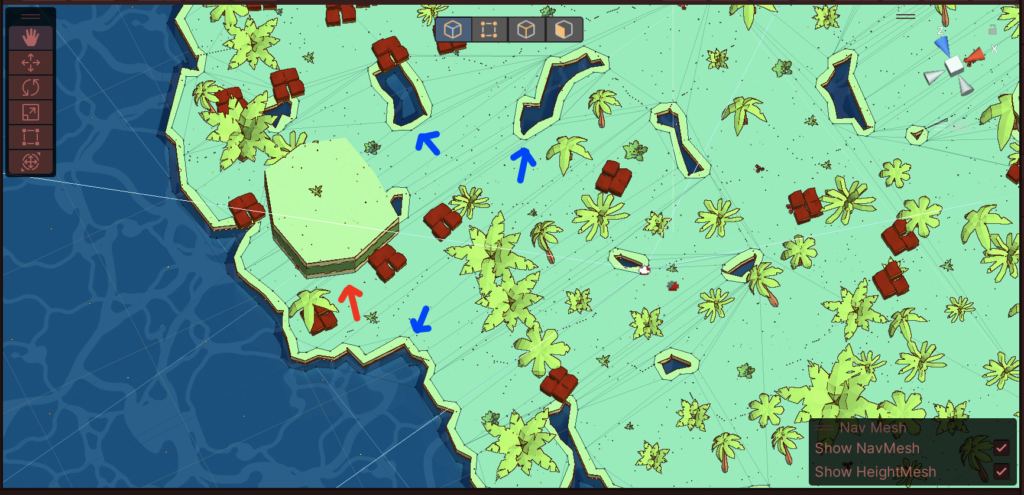
The one elevated GameObject at the red arrow did separate itself from the NavMesh, but it also lacked any kind of boundary – the blue arrows point to examples of a small “expected” boundary around NavMesh borders which help the NavMeshAgents navigate cleanly – when you have an obstacle like that one elevated piece with no boundary, NavMeshAgents start bumping up against it, get stuck, think its not there, and sometimes waste a lot of time trying to go through it instead of around it. To solve this, you need to rebuild the NavMesh whenever you modify the landscape – again, the NavMeshSurface package makes this relatively easy.
At the end of the code I wrote that modifies the NavMesh, I added:
NavMeshSurface nm = GameObject.FindObjectOfType<NavMeshSurface>();
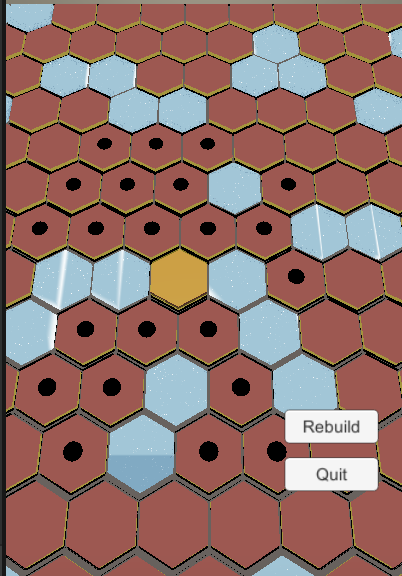
nm.UpdateNavMesh(nm.navMeshData);This regenerates the NavMesh to incorporate changes – it also runs asynchronously so you don’t see a performance “burp”, but it also means the update isn’t “instant”, which was fine for me in this case. The end result was:

Notice how the elevated GameObject now has a nice NavMesh boundary padding around it – this helps the agents navigate around it smoothly and successfully.
By eliminating the holes in the NavMesh formed by placing trees and fixing the padding around modified areas of the NavMesh, I found the NavMeshAgents moved much more smoothly and orderly around the play area. A healthy NavMesh creates smoother, better pathing for your agents.
One other side bonus that I found reduced NavMeshAgent “traffic jams” – randomize the NavMeshAgent avoidancePriority – for example, put this code in your NavMesh agent’s Start() function:
agent = GetComponent<NavMeshAgent>();
agent.avoidancePriority = Random.Range(1, 100);
Every agent will have a variegated priority when evaluating movements that interfere with each other. In my case, I didn’t care who had the priority, but giving them different priority levels meant that agents in close proximity to each other did a much better job of “zippering” themselves together rather than fighting over who should be first.